
On a recent internal penetration test, I was able to obtain Domain Admin privileges in a segmented network by calling on my ancient digital forensics skill set. I got my start in infosec directly after college doing digital forensics and incident response for a few years, but I got tired of cleaning up after the bad folks and went over to the dark side of infosec via penetration testing and red teaming.
During initial port scanning, several systems reported back with TCP port 2049 for NFS as open. NFS, or Network File System, is a distributed file system that can be used to access data on remote systems as if it were a locally attached storage on your system. There are plenty of tools out there that can be used to enumerate shares and export lists for NFS, I tend to fall back to the old ways and just use the utility showmount to view the export list of the server.
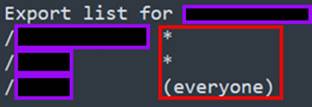
showmount -e <TARGET>This command above will show us a list of the share names as well as the export list of what systems have access to the specific share. The key thing we are looking for here is a share with a wildcard (*) or “everyone” listed as permitted to access the shares, much like the one below.
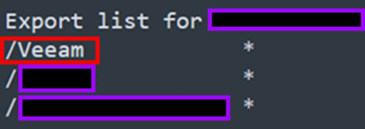
Much like an open SMB or FTP share, occasionally we find some great information by accessing NFS shares. With NFS specifically, I always look for system backups or clones as NFS is a common service used by automated backup solutions. In this case, one share called “Veeam” caught my attention as I know it is a great enterprise solution for automated backups. Veeam offers a backup and disaster recovery solution for enterprise clients that can integrate into a standard workflow and perform automation around on-prem and cloud backups to help maintain availability and uptime.
The next step in this journey is to mount the remote share to our local system so we can browse for some juicy data. I try to stay very organized during engagements, so I tend to set up the directories in my attack machine to correspond with the activity I am performing. This keeps things separate logically in my head and helps with documentation and note-taking while compiling the data to create our final deliverables to a client.
To mount and interact with a remote NFS share, you first have to create a mounting point on your local system. In this case, from our Linux user’s home directory, we create a directory named “nfs”, and then a subdirectory of that named “mnt1”.
mkdir nfs; cd nfs; mkdir mnt1Now we will mount the share. One of the most important things to note here is that we want to access the data in read-only mode (using the -o ro flag in the command) to ensure we aren’t accidentally tampering with or destroying data.
sudo mount -o ro -t nfs <IP ADDRESS>:/<SHARE NAME> $HOME/nfs/mnt1NOTE: this is a very basic example, so you may need to modify this command depending on the target system’s configuration.
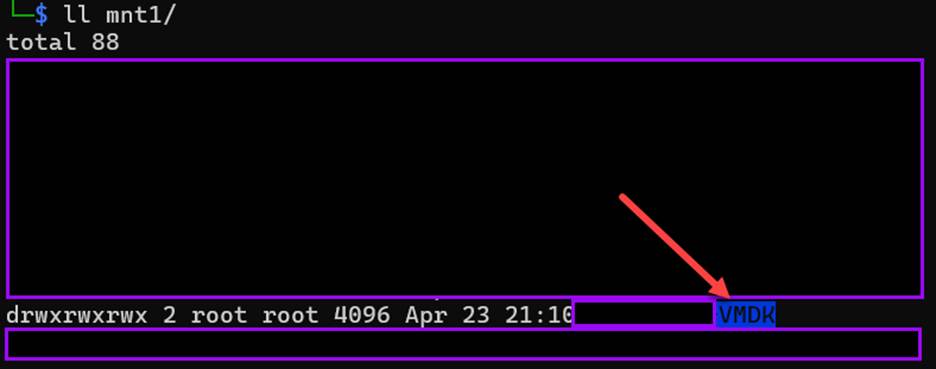
Once mounted, you can browse through the share as normal. In many cases, I have found that solutions like Veeam will encrypt the backup images at rest. However, in this instance a fresh unencrypted flat .VMDK file was found located in a VMDK directory.
The next step was to copy the rather large file down to my local system so I could perform further analysis. This can be accomplished in many ways obviously, and a way to speed it up is to first compress the large file on your remote attack system (assuming you have the disk space to do so) and then copy it down so you are moving less data.
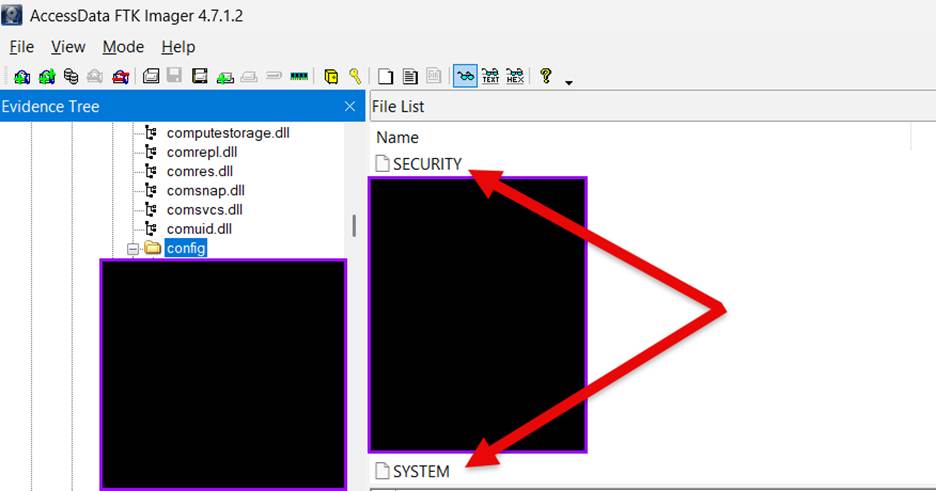
This is where I had to dust off my old DFIR hat and get to work. I used exterro’s (formerly AccessData) free FTK Imager tool to add the .VMDK image as an evidence item so that I could browse the file system and export any files of interest.
Since this was a backup of a Windows Domain Controller, I am most interested in extracting credentials from NTDS, SAM, and LSA. The NTDS.dit file is located at:
C:/Windows/NTDS/ntds.dit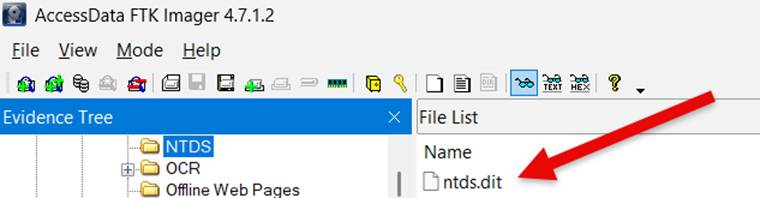
Next, we will extract SAM as well as the SYSTEM and Security registry hives located at:
- SYSTEM: C:/Windows/System32/config/SYSTEM
- SECURITY: C:/Windows/System32/config/Security
- SAM: C:/Windows/System32/config/SAM
Once we have those files extracted, we can extract the NTLM hashes from the image using tools from the Impacket suite.
The hashes from the ntds.dit file can be extracted with the following command:
impacket-secretsdump -ntds ntds.dit -system SYSTEM -hashes lmhash:nthash LOCAL -outputfile ntlm-extract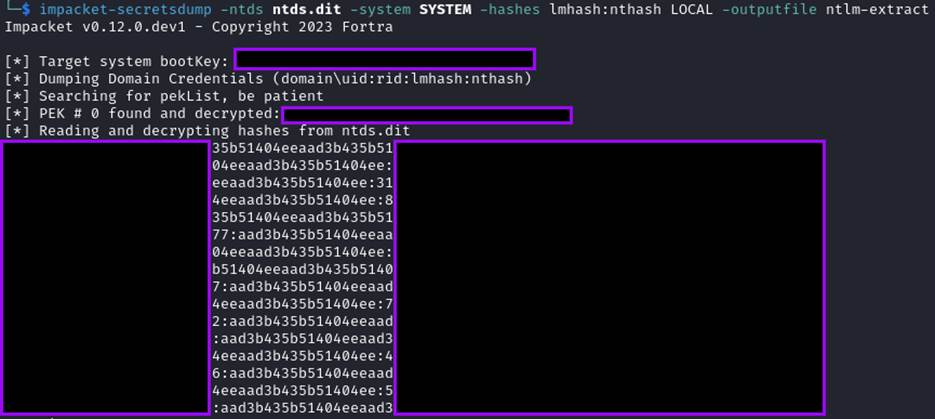
The SAM hashes can be extracted with the following command:
impacket-secretsdump -sam SAM -system SYSTEM LOCAL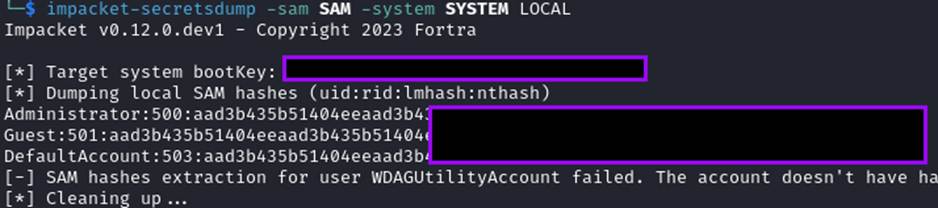
And finally, the information from LSA can be dumped with the following command:
impacket-secretsdump -security SECURITY -system SYSTEM LOCAL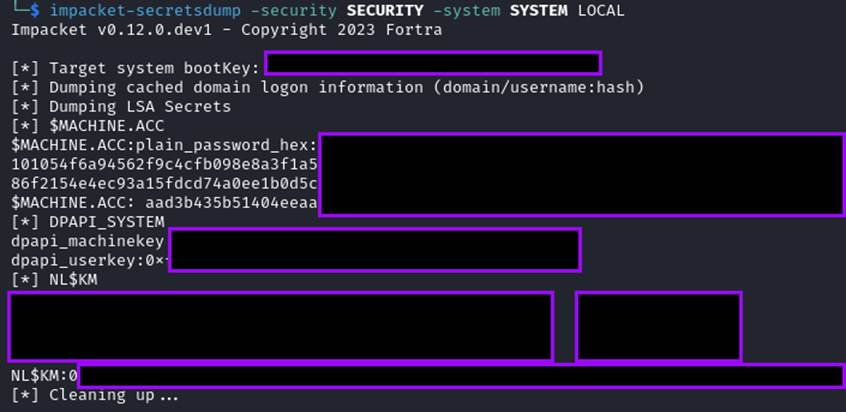
At this point, we can throw all the hashes onto a server using hashcat to crack them (or test them using pass-the-hash), allowing us to go from initial network access with no credentials, to obtaining a Domain Admin account in a very simple manner.
This attack path is a great example of how skills from previous technical roles within infosec can still help even a seasoned penetration tester or red teamer.